The New Directory
The Whereabouts team has been working hard on a new Directory App that makes it even easier to keep listing data fresh.
The New Directory gives you a centralized workspace for managing all of your destination's business listings. It's organized around a simple lifecycle so you always know what needs your attention and what's live.
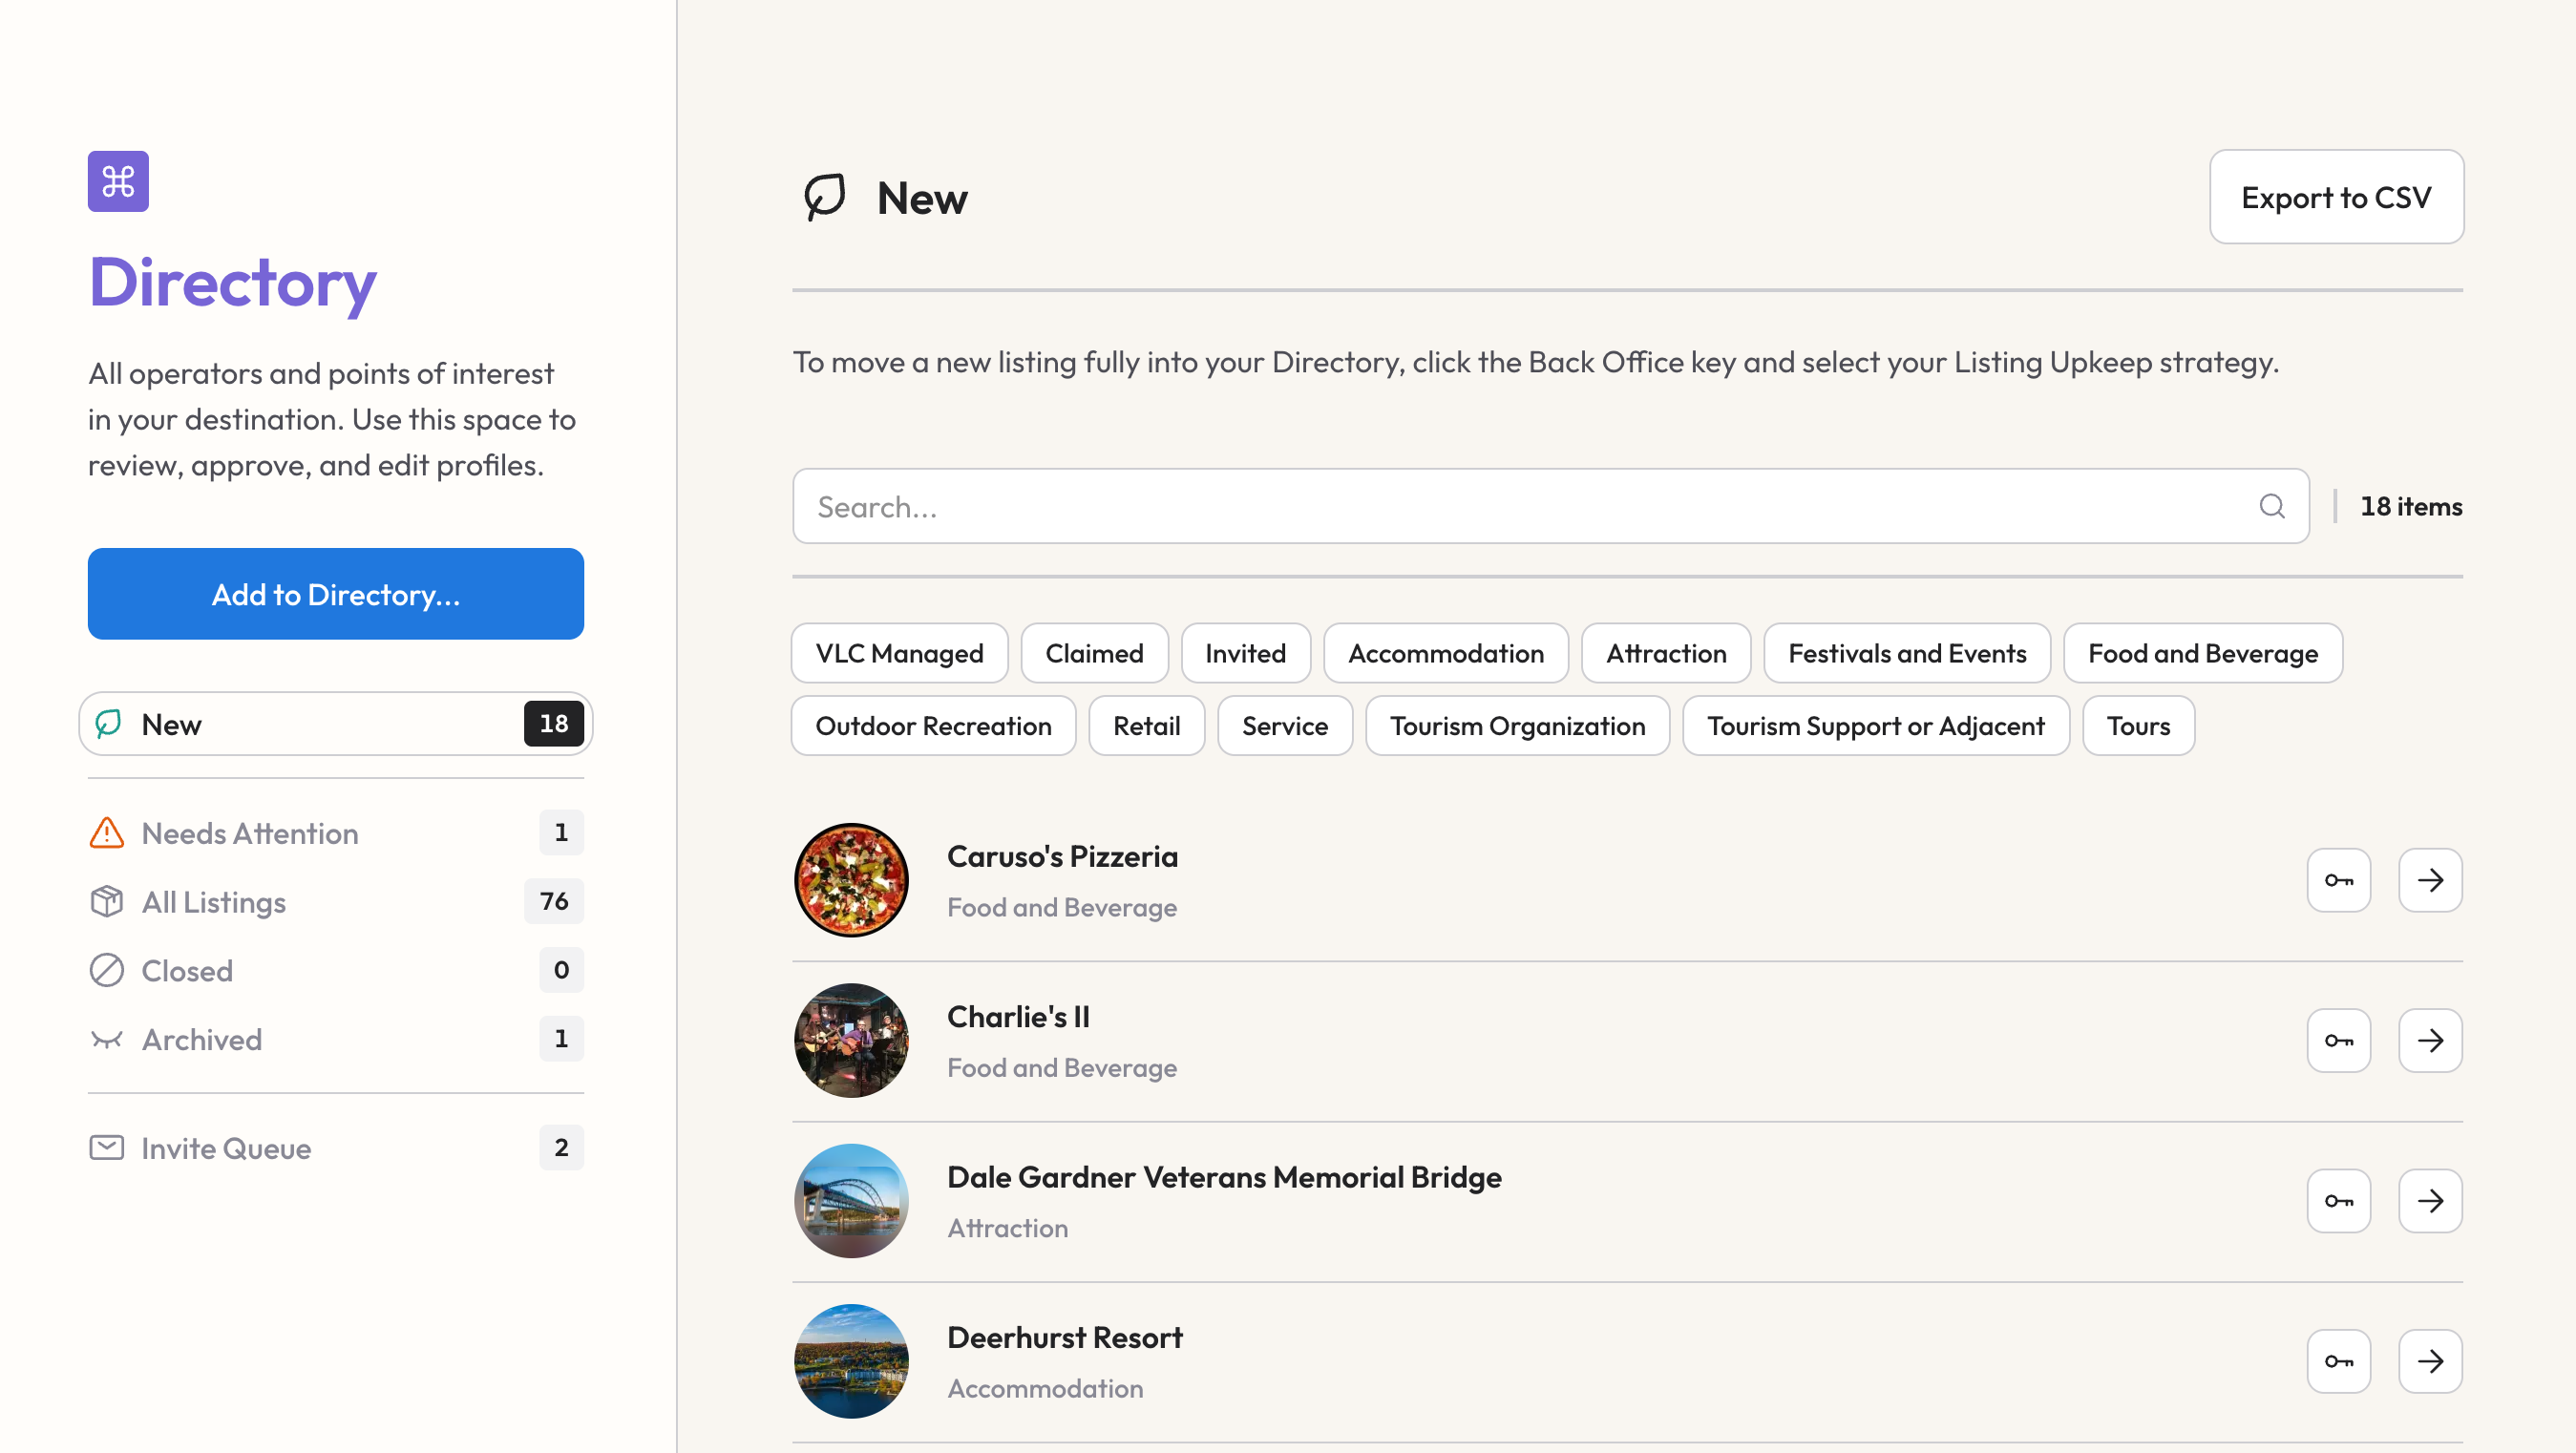
How listings are organized
The sidebar groups your listings by status:
- New — Draft listings that haven't been published yet, including newly connected listings.
- Needs Attention — Listings that need your review. A listing lands here when a business owner submits changes for approval, when a listing you manage hasn't been updated in a while, or when you manually flag it for follow-up.
- All Listings — Every published and in-review listing in your directory.
- Closed — Businesses marked as temporarily or permanently closed.
- Archived — Listings you've unpublished from the directory.
- Invite Queue — People queued to receive claim or update emails (see below).
The directory defaults to Needs Attention if there are items waiting for review, otherwise it opens to All Listings.

The listing lifecycle
Every listing follows a straightforward path:
- Create or connect a listing using the Add listing button. You can create a brand new listing or connect an existing one that's already on the platform.
- Edit the profile — fill in descriptions, contact info, hours, tags, and media.
- Choose an upkeep strategy — decide whether your organization will manage the listing or whether the business owner will maintain it (see below).
- Approve the listing to publish it to your directory.
You can unpublish (archive) a listing at any time from the Back Office flyout, and re-approve it later.
Shared listings: one listing, many directories
When you connect an existing listing to your directory, you may notice it's already managed by another organization. This is by design.
Whereabouts uses a shared-listing model — similar to how Wikipedia maintains one article that many contributors keep current, rather than dozens of competing copies. Each business has one listing on the platform, and multiple organizations can connect that listing to their own directories.
This approach has several advantages:
- Data stays fresh. When a business owner or any managing organization updates a listing, those changes are reflected everywhere the listing appears. No more outdated phone numbers or old descriptions lingering in one directory while another has the correct info.
- No data fragmentation. Without shared listings, the same business often ends up with slightly different profiles across different directories — different descriptions, conflicting hours, mismatched contact info. A single source of truth eliminates this problem.
- Better experience for business owners. Operators only need to maintain one listing, regardless of how many destination directories feature their business. They update once and every connected directory benefits.
- Less duplicate work for your team. If another organization has already built out a listing with descriptions, images, and tags, that work is available to you the moment you connect it — you don't need to start from scratch.
When a connected listing is managed by another organization, you can still review it, add it to your directory, and flag it if something needs attention. The managing organization handles day-to-day upkeep, which means less maintenance work for your team while keeping your directory accurate.
Your marketing, your way
While the core listing data is shared, Whereabouts gives your organization full control over how you present and organize listings in your own directory:
- Private Back Office — Your tags, notes, and internal organization are completely private. Other organizations connected to the same listing will never see them. This means you can categorize and annotate listings to match your own marketing strategy without affecting anyone else.
- Widget-level overrides — When displaying listings through your widgets, you can override fields like the description, teaser text, and featured images. This lets you bring your own marketing voice and visual identity to the general-purpose data of a listing — tailoring how a business appears to your audience without changing the underlying listing for others.
In practice, this means the shared listing provides a solid, well-maintained foundation of factual business data, while your organization layers on its own positioning, messaging, and curation on top.
Upkeep strategy
Before you can approve a draft listing, you need to decide who keeps it up to date:
- My organization — Your team is responsible for maintaining the listing. It will be labeled as organization-managed.
- Business owner — The business owner claims the listing and keeps it current. You can invite them to claim it via the Invite Queue.
If a listing is already managed by another organization, that relationship is preserved — you don't need to set an upkeep strategy yourself.
Set this in the Back Office panel, accessible from the sidebar when viewing a listing.
Listing freshness
Keeping your directory current is important for visitor trust and search visibility. Whereabouts tracks how recently each listing has been updated and flags listings that may be going stale.
- Freshness tracking — Each listing's last-updated date is monitored against your organization's freshness settings. More on that below.
- Stale listings — When a listing you manage hasn't been updated within your configured freshness window, it automatically moves to Needs Attention so you can review and refresh it.
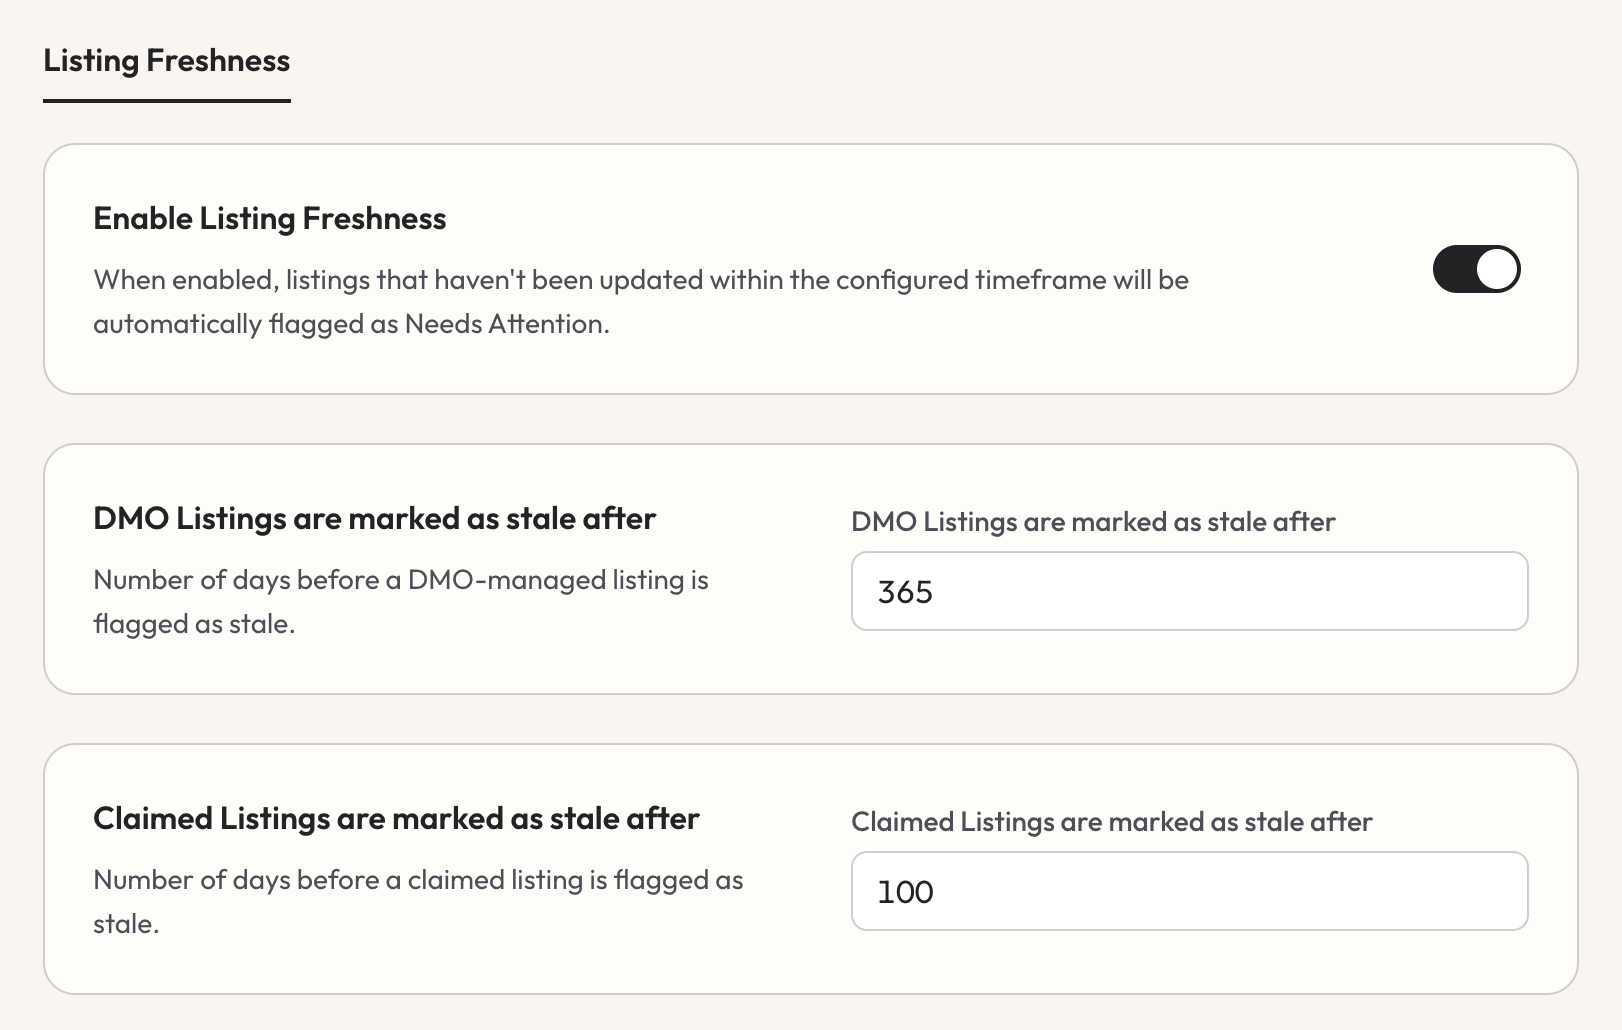
- Freshness settings — In Organization Settings → Directory Settings, you can enable this feature and configure how long a listing can go without an update before it's considered stale (see screenshot below). This lets you set expectations that match your destination's pace — a busy urban directory might use a shorter window than a seasonal rural one.
For listings managed by business owners that have gone stale based on your freshness settings, you can use the Invite Queue's Freshen feature to prompt them to update their information.
Using AI to complete listings
If a listing has a website URL, you can use Whereabot AI to automatically populate profile fields and find images — saving significant time when building out your directory.
Profile scan
- Open a listing's Profile tab. If a website is set and the listing hasn't been scanned yet, you'll see a prompt: "Would you like Whereabot AI to fill in these fields for you?"
- Click Let's Go to open the scan modal.
- Select which fields to scan for — descriptions, tags, social links, email, phone, and address.
- Click Start scanning. Whereabot will read the business's website and extract information.
- Review the results — the modal shows which fields were found and which weren't.
- Click Apply Results to merge the AI-generated content into the profile form, or close to discard. If the results aren't right, use the Undo banner to revert.
- Review and save the profile as you normally would.
Image scan
- Open a listing's Media tab. If a website is set, you'll see a similar AI prompt.
- Click Let's Go and confirm. Whereabot will scan up to 5 pages of the website and use AI to select the best images.
- Review the candidates — each image shows a thumbnail, alt text, and whether it's recommended as a featured image. Use the checkboxes to include or exclude images.
- Click Add Selected Images to upload them to the listing.
Organization-wide AI prompts
In Organization Settings → Directory Settings, you can add custom prompt instructions that guide how Whereabot writes descriptions and selects images for your listings. This is useful for maintaining a consistent tone or prioritizing certain types of content across your directory.
Using the New Tagging System
The New Directory has a more advanced tagging system that makes it easy to see all global tags across Whereabouts.

The Invite Queue
The Invite Queue helps you reach out to business owners and ask them to claim or update their listings. It's available in the directory sidebar.
Adding people to the queue
When viewing a listing, use the Back Office panel to add a business owner to the Invite Queue by their name or email address. Each queue entry links a person to one or more listings.
Queue statuses
Each person in the queue has a status:
- Ready — Queued and waiting to be sent an email.
- Invited — Email has been sent; waiting for the recipient to act.
- Stale — Previously invited, but the recipient hasn't responded after a period of time.
- Accepted — The recipient claimed or updated their listing.
Sending emails
Use the Send emails button at the top of the Invite Queue to send messages in bulk. There are three modes:
- Invite — Send the initial claim-your-listing email to everyone in the Ready state.
- Reinvite — Send a follow-up nudge to people who were previously invited.
- Freshen — Ask stale contacts to update their listing information.
You can also freshen individual stale entries from their detail panel.
Cleaning up the queue
Over time, some invitees may never respond. Use Clean up queue to remove entries that have been contacted multiple times without a response. When cleaning up, you can optionally convert those listings to organization-managed so your team takes over upkeep.
Filtering by invite status
Outside the Invite Queue view, you can use the Invited filter in All Listings to see which listings currently have people in the invite pipeline.